November 17, 2026
Outsourcing clipping path work can help photographers, agencies, and e-commerce teams process more images without expanding their in-house editing workload. Yet sending files to an external provider does not automatically guarantee clean edges or consistent results.
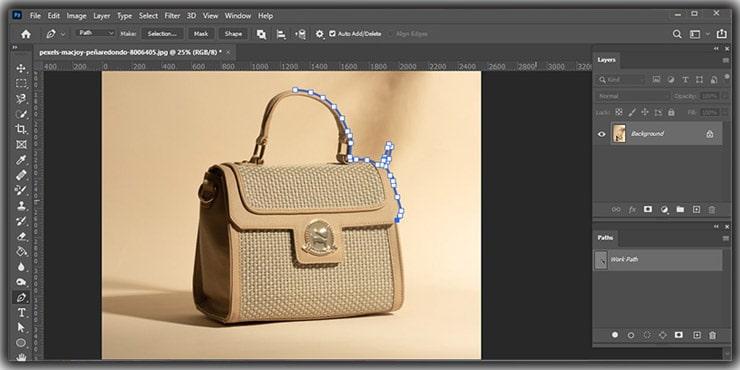
Quality depends on choosing the right partner, explaining the requirements, testing representative images, and maintaining a review process. A little preparation before the first order can prevent repeated revisions and protect the visual standard of a product catalog.
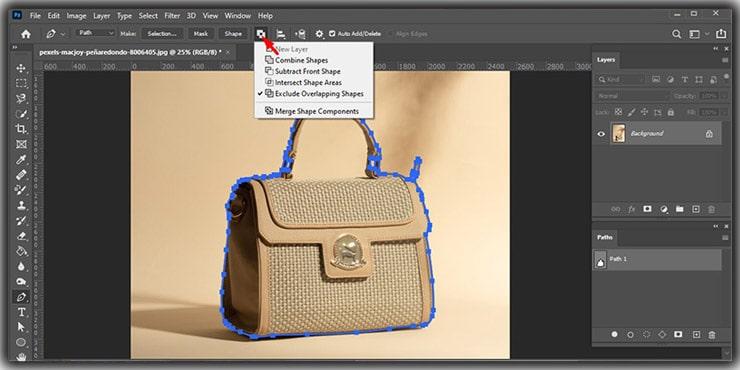
Start by explaining what the final image needs to achieve. A simple object on a plain background may need a straightforward path, while jewelry, shoes, furniture, or objects with holes and narrow gaps may require more detailed work. Explain whether the image needs a transparent background, a white background, a specific crop, or an additional shadow.
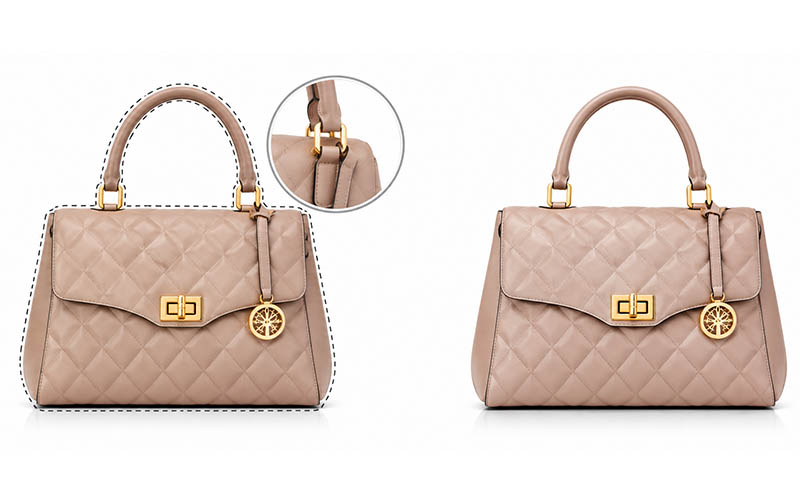
Describe how closely the path should follow the object’s edge and how small details should be handled. If a soft edge, motion blur, hair, fur, or transparent material is involved, a clipping path alone may not be the most appropriate technique. Ask the provider to recommend masking or a combined workflow when necessary rather than forcing every image into the same method.
Look for examples that resemble your own image types. A portfolio of simple objects may not demonstrate the ability to handle reflective metal, fine straps, intricate jewelry, or complex silhouettes. Ask about the provider’s workflow, expected turnaround, revision process, and experience with your type of project.
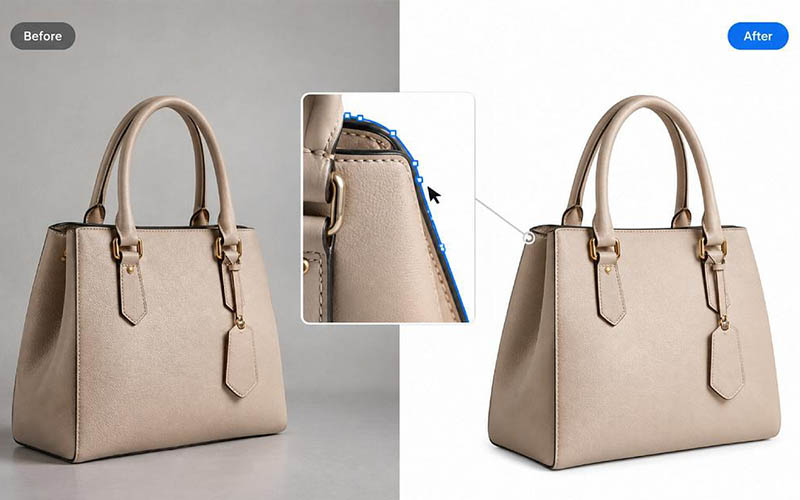
Do not rely only on claims such as fast, perfect, or premium. A representative test is more useful than broad promises. Evaluate edge smoothness, retained detail, accurate shape, clean interior gaps, and whether the result looks natural when placed on the intended background. Also consider how clearly the provider communicates when an image presents a technical challenge.
Send the highest-quality originals available and avoid resizing or compressing them unnecessarily before editing. Use a predictable folder structure and filenames that preserve product IDs or SKU numbers. Include a brief that states output format, dimensions, color requirements, background, shadow treatment, and naming conventions.
Reference images can help explain the expected result. If different product categories need different treatment, separate them into folders and identify the rules for each group. Clear instructions reduce assumptions and make it easier to compare completed files with the original brief.
Before outsourcing hundreds or thousands of images, select a test batch that reflects the real workload. Include easy, average, and difficult examples. Review the output at normal display size and at close zoom. Check whether curves look smooth, edges avoid unwanted halos, holes and gaps are preserved, and the product itself remains intact.
Use a simple feedback document to mark exact issues. Instead of saying an image looks wrong, identify the affected edge, unwanted background pixels, missing detail, or incorrect crop. Ask the provider to revise the test and confirm whether the correction can be applied consistently to the full batch.
Even with a reliable partner, define who checks the delivered images and how errors are reported. For a large order, inspect a meaningful sample from each batch and check all high-priority or unusually complex images. Track recurring issues such as rough edges, incorrect filenames, missing files, or inconsistent margins.
Agree on how revisions work before production begins. Document the acceptable quality standard and distinguish between an editing error and a change to the original brief. This avoids confusion and helps both sides resolve problems quickly.
Product files can reveal unreleased designs, campaign plans, or commercial information. Use appropriate file-transfer methods and confirm who can access the files, how long they are retained, and whether deletion can be requested. Put any confidentiality requirements in writing.
As the workload grows, use repeatable naming, folder structures, batch instructions, and delivery checks. Review turnaround and correction rates over time rather than judging a provider from a single successful order. A scalable outsourcing relationship is built on clear expectations and consistent communication.
Before the work begins, translate your expectations into instructions that can be followed consistently. State the objective, required output, technical specifications, and any details that must remain unchanged. Include representative examples and identify unusual images that may need special handling. A concise brief is more useful than a long request that leaves important decisions open to interpretation.
Ask the person completing the work to raise questions before processing a full batch. Confirm assumptions about edge treatment, color, crop, naming, file format, and revision rules. This small alignment step can prevent large amounts of rework and creates a reference that can be reused for future projects.
A frequent mistake is to focus on the finished image while overlooking the process that produces it. Unclear filenames, inconsistent source files, missing references, and late changes to the brief can cause errors even when the editing itself is strong. Establish a predictable way to submit files, communicate changes, approve samples, and receive final outputs.
Another mistake is to judge a provider or method using only one easy image. Include representative examples and assess the output as a group. Check both visual quality and delivery accuracy, and record issues in a way that makes them easy to correct. A consistent workflow makes problems easier to identify before they spread across an entire project.
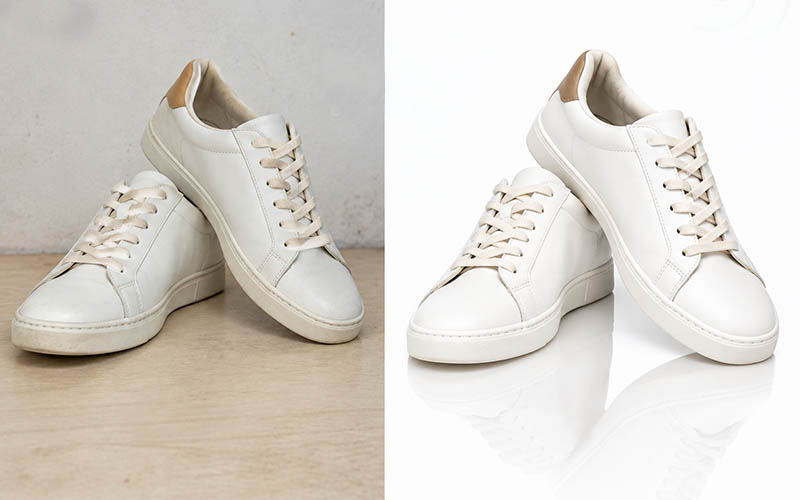
Before approving delivery, check the image against the original brief. Confirm that the subject is intact, important details remain visible, the color and crop are appropriate, and there are no distracting edges or artifacts. Verify file dimensions, formats, naming, and the number of files received. A visual review and a technical file check catch different types of errors, so both should be part of the process.
Use the checklist proportionately. High-value, complex, or campaign-critical images may need a full review, while routine items can be reviewed through a consistent sampling process once the workflow is proven. If an error appears repeatedly, increase inspection and update the instructions until the issue is resolved.
Do not treat the first delivery as the only measure of success. Over several projects, track recurring corrections, turnaround reliability, communication quality, and the amount of internal time required to prepare or fix files. These observations provide a more realistic view of the process than a single successful example.
Use the results to make targeted improvements. If errors cluster around one image type, provide better reference material or adjust the technique. If files are frequently misplaced, revise the naming process. Regular, practical reviews help keep the workflow aligned with changing products, catalog size, and business priorities.
Products with defined edges, such as shoes, bags, furniture, accessories, and many retail products, are common candidates.
No. Hair, fur, translucent objects, and soft edges may be better handled with image masking or other techniques.
Inspect edge accuracy, curves, interior gaps, retained detail, and the appearance of the cutout on its intended background.
Start with a representative test batch, confirm the standard, and then scale up once the workflow is reliable.
Choosing the right approach to outsource clipping path services starts with a clear understanding of your images, quality expectations, deadlines, and workflow. Define the result you need, use representative examples, and review the output against consistent standards. A practical process helps your team avoid preventable revisions and make better decisions as image volume grows. Revisit your workflow periodically so it continues to fit your products, customers, and business goals.