
To make a reflection using the vector shape making tool called Clipping Path, use the Object menu in Illustrator and select Clipping Mask to create the shape. Additionally, right-click on the document and choose Make clipping mask for a quick shortcut to achieve the result.
Creating reflections with the vector shape making tool Clipping Path can enhance the visual appeal of your designs. By skillfully applying this technique in Adobe Illustrator, you can achieve a mirror effect that adds depth and dimension to your artwork.
This guide will provide a step-by-step approach to help you master the art of reflection creation using the powerful Clipping Path tool. With a few simple clicks and adjustments, you can elevate your design projects to a professional level with stunning reflections that captivate the viewer’s eye. Let’s delve into the process and unlock the full potential of Clipping Path for creating captivating reflections in vector shapes.
Exploring these techniques with the Clipping Path tool in Illustrator can enhance your design process and offer creative possibilities.

Credit: helpx.adobe.com
Creating Clipping Masks: When using a vector shape-making tool like a clipping path, one essential technique is making clipping masks. This feature allows you to define a specific area where the content is visible, hiding anything outside that boundary.
To create a clipping mask in Illustrator, you can follow these simple steps:
You can also utilize the Layers Panel for creating clipping masks:
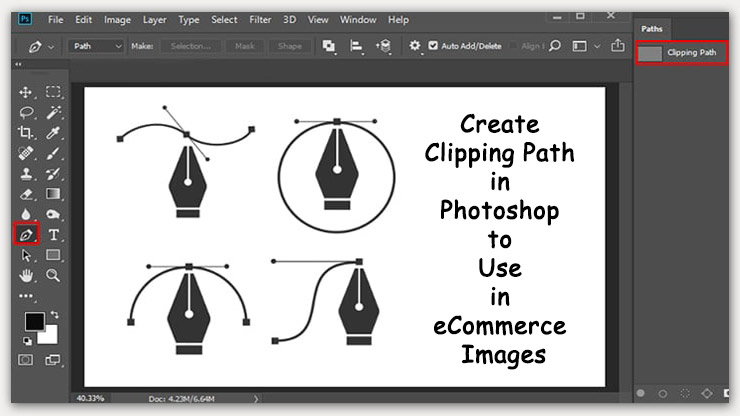
Clipping path techniques are essential for creating precise selections and achieving clean, professional image cutouts. One such technique involves using the vector shape-making tool called Clipping Path. This powerful tool allows designers to neatly outline and isolate specific areas of an image, making it easier to manipulate, edit, and enhance. Let’s delve into the various aspects of Clipping Path techniques, including the different types, essential tools, and helpful tips and tricks for seamless execution.
When it comes to clipping paths, various types cater to different image intricacies. The primary types include:
Efficient execution of clipping path techniques requires the use of appropriate tools. Some essential tools for clipping paths include:
Mastering the art of clipping path can be enhanced with these valuable tips and tricks:
Credit: www.shutterstock.com
When it comes to editing photos, one of the most important tasks is changing or replacing the background. With the help of Photoshop’s powerful features, you can easily achieve this with a tool called clipping path.
A clipping path is a vector shape-making tool in Photoshop that allows you to create a shape around an object in an image and remove the background, leaving you with a clean and isolated subject. This technique is commonly used in product photography, e-commerce, and graphic design.
To change the background of a photo using a clipping path, follow these steps:
Now that you have created a selection, it’s time to remove the background:
By following these steps, you can easily replace or change the background of any photo using the vector shape making tool called clipping path.
Credit: www.clippingpathcenter.com
To make a shape clipping path in Illustrator, go to the Object menu and click on Clipping, then hit Make. Alternatively, you can right-click on the document and choose Make Clipping Mask.
To create a clip-path in Illustrator, go to Object > Clipping Mask > Make or use the Make Clipping Mask shortcut. You can also click the Make/Release Clipping Mask icon in the Layer Panel.
To create a reflection in Illustrator, use the Reflect Tool with Vector Shape Making Tool like Clipping Path.
A clipping path and masking are techniques used in graphic design to isolate objects for editing. The clipping path creates hard edges, while masking works for soft edges, both using a pen tool or painting.
The use of a vector shape-making tool such as a clipping path can significantly enhance the visual appeal of your designs. By adding reflections, you can create depth and dimension, making your images more dynamic and engaging. The versatility of this tool opens up endless possibilities for creativity and professional image editing.
Start incorporating clipping paths into your design process to elevate your visuals to the next level.


