August 13, 2026
Removing a background in Photoshop is one of the most important photo editing techniques for e-commerce sellers, photographers, graphic designers, and creative agencies. A clean background removal can transform an ordinary product photograph into a professional-looking image that is ready for an online store, marketplace, advertisement, catalog, or social media campaign.
Adobe Photoshop offers several tools for removing backgrounds, including Remove Background, Quick Selection, Magic Wand, Object Selection, Pen Tool, Select and Mask, and layer masks. The best method depends on the complexity of the image, the subject’s edges, hair, shadows, and the final use of the photograph.
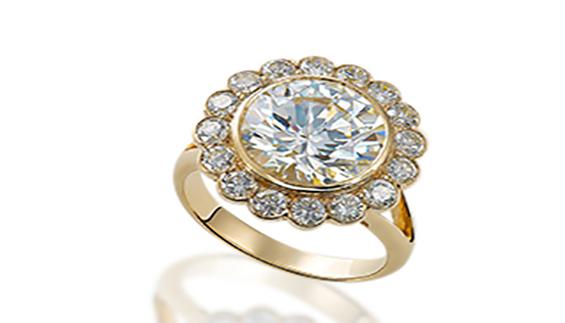
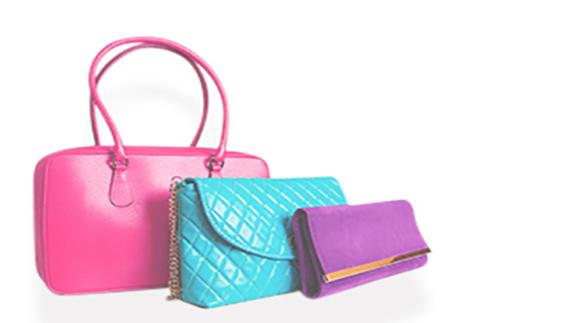
For e-commerce businesses, professional background removal is particularly valuable because products usually need consistent backgrounds across an entire catalog. Whether you are selling clothing, jewelry, furniture, electronics, cosmetics, or handmade products, properly removing the background can make your product images look cleaner and more trustworthy.
In this guide, you’ll learn how to remove background in Photoshop step by step, which Photoshop tools work best for different images, and how to create professional product cutouts without damaging important details.
Background removal separates the main subject from its original environment. Instead of showing a product against a distracting room, table, or outdoor scene, you can place it on a clean white, transparent, or customized background.
For e-commerce sellers, background removal can improve product presentation and help maintain visual consistency throughout an online store. Many marketplaces also recommend or require specific background styles for product photography.
Professional background removal can be useful for:
A clean cutout also makes it easier to resize, reposition, and reuse the same product image across different marketing materials.
One of the easiest ways to remove a background in modern Photoshop is the Remove Background feature. It uses Adobe’s image-processing technology to identify the primary subject and separate it from the background.
Start Photoshop and open the image you want to edit.
Go to:
File → Open
Select your photograph and open it in Photoshop.
Before making changes, it is a good idea to duplicate the original layer. This allows you to return to the original image if something goes wrong.
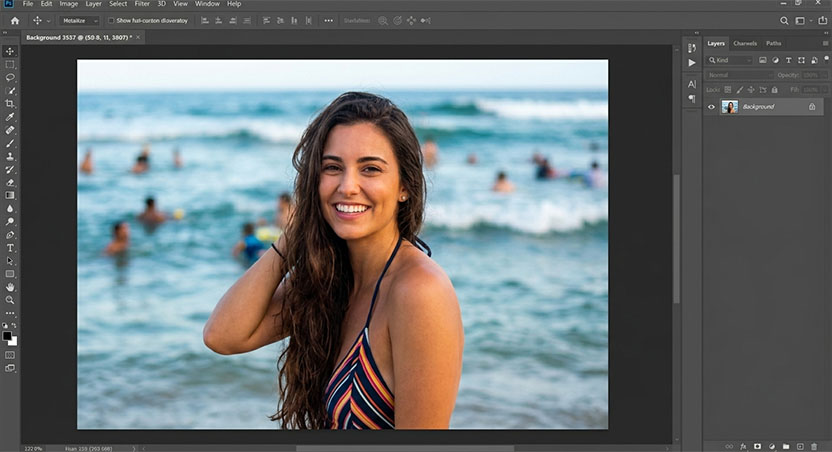
Right-click the layer and select Duplicate Layer.
If the image appears as a locked Background layer, click the lock icon to unlock it.
Alternatively, duplicate the layer and work on the duplicate.
Working non-destructively is especially important when editing commercial product photography because you may need to make adjustments later.
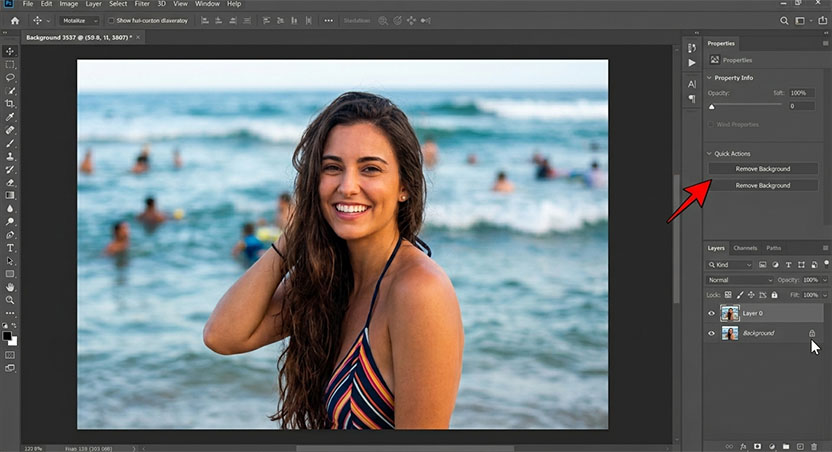
Select the image layer and open the Properties panel.
Under Quick Actions, choose:
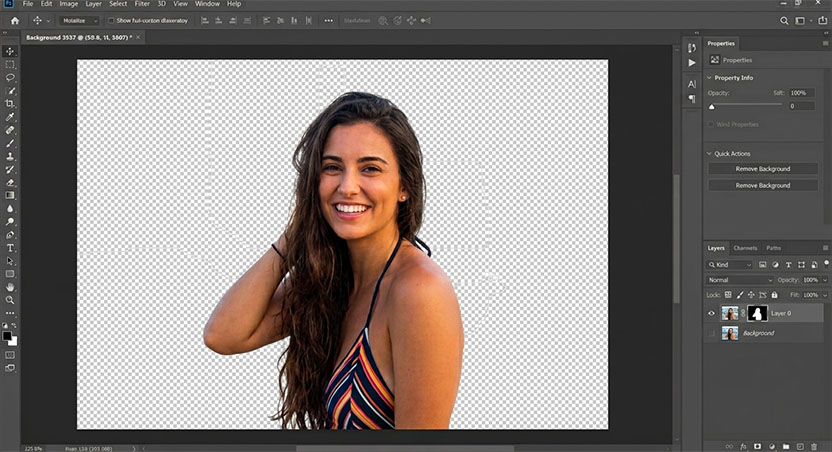
Remove Background
Photoshop will automatically detect the main subject and attempt to remove the surrounding background.
The result may be excellent for simple images with clear contrast between the subject and background. However, complicated images may require additional manual refinement.
The Object Selection Tool is another convenient Photoshop option for product photographers and e-commerce editors.
It works particularly well when the subject has a relatively clear shape.
From the toolbar, choose:
Object Selection Tool
You can also press W to access Photoshop’s selection tools.
Drag a selection box around the object you want to keep.
Photoshop will analyze the area and attempt to identify the object.
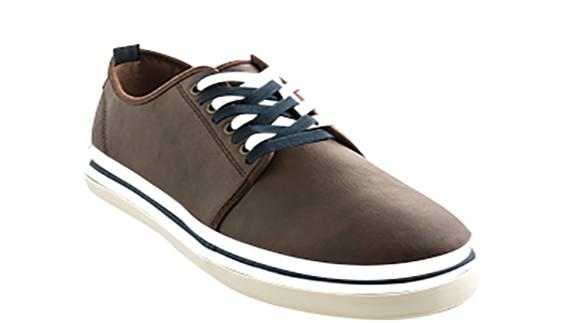
For example, if you are editing a shoe photograph, draw a rectangle around the entire shoe. Photoshop can often detect the shoe’s boundaries automatically.
The automatic selection may include unwanted background areas or remove small sections of the product.
Use the Add to Selection and Subtract from Selection options to correct the selection.
Once the selection looks accurate, you can create a layer mask to hide the background.
The Quick Selection Tool is useful when the subject has clear edges and the background is reasonably simple.
Select the Quick Selection Tool and brush over the subject.
Photoshop will automatically expand the selection based on color, texture, and edge information.
If Photoshop selects too much of the background, hold Alt or Option while brushing over unwanted areas to subtract them.
This technique is useful for:
However, Quick Selection may struggle with very thin edges, transparent objects, fur, and complex hair.
For professional product image editing, the Pen Tool remains one of the most accurate background removal methods in Photoshop.
It takes longer than automatic selection tools, but it provides excellent control over edges.
The Pen Tool is particularly useful for products with:
Examples include smartphones, watches, bottles, furniture, shoes, boxes, and electronics.
Choose the Pen Tool from the Photoshop toolbar or press P.
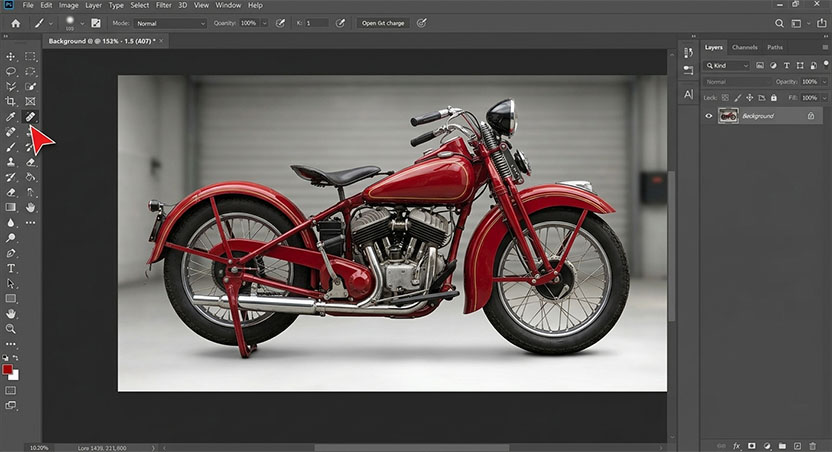
Zoom into the product and begin placing anchor points around its edge.
For curved areas, click and drag to create smooth curves.
Take your time around complicated sections because the quality of the path determines the quality of the final cutout.
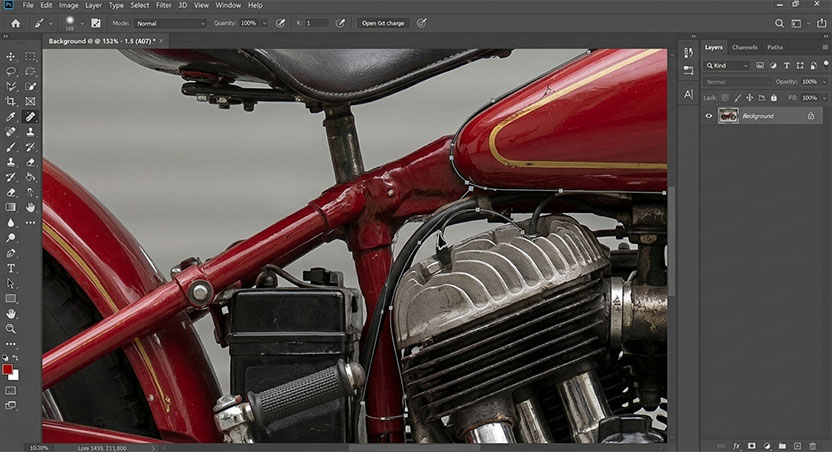
Once the outline is complete, right-click the path and choose:
Make Selection
Choose an appropriate feather value. For most product images, a very small feather can help prevent unnaturally sharp edges.
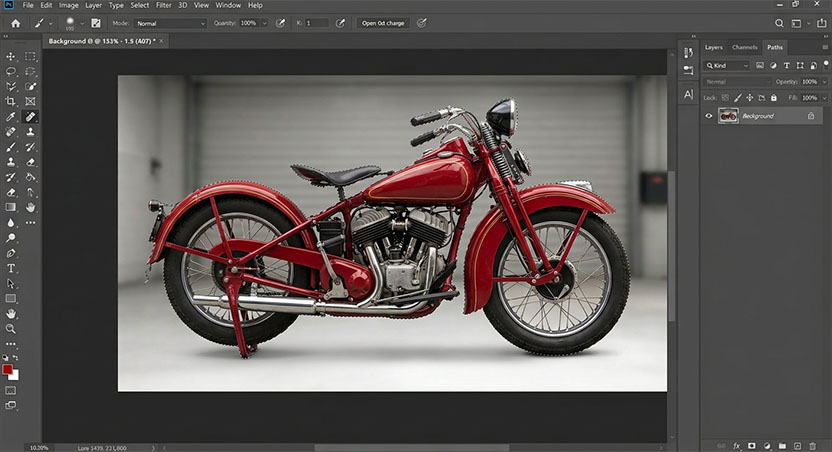
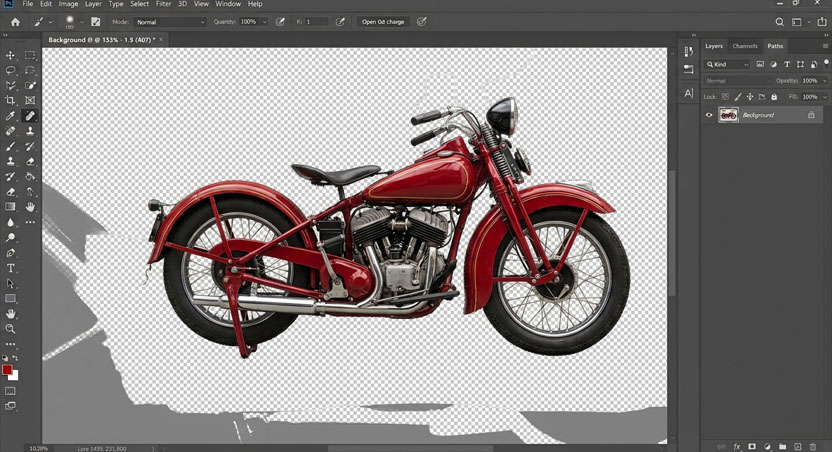
With the product selected, click the Layer Mask icon.
The background will become hidden while the product remains visible.
This is preferable to permanently deleting the background because you can edit the mask later.
Select and Mask is especially useful when the image contains complicated edges.
You can access it from the selection tools after creating a selection.
It provides controls for refining:
The Refine Edge Brush can be particularly helpful for hair, fur, feathers, and other fine details.
For portrait photographers, this feature can significantly improve the quality of hair selections.
Hair is one of the most challenging subjects when removing backgrounds in Photoshop.
A standard selection may create an unnatural solid edge around the hair. Instead, zoom into the subject and use Select and Mask with the Refine Edge Brush.
Brush carefully around the hair boundary so Photoshop can analyze fine strands.
For complex hair, you may also need to combine several techniques:
The goal is not simply to remove the background. The goal is to preserve realistic hair details.
White backgrounds are common in product photography, and they are usually easier to remove than complex backgrounds.
If the product has strong contrast against white, you can try the Magic Wand Tool.
Select the Magic Wand Tool and click on the white background.
Adjust the tolerance if necessary. A lower tolerance selects a narrower range of similar colors, while a higher tolerance selects a broader range.
After selecting the background, refine the selection and create a layer mask.
Be careful with products that contain white or very light-colored areas because the Magic Wand may accidentally select parts of the product.
After removing the original background, you may want to create a transparent PNG.
A transparent background is useful when the same product needs to be placed on different website designs, advertisements, or promotional graphics.
To preserve transparency, make sure the unwanted background is hidden or removed, and then export the image as a format that supports transparency, such as PNG.
Go to:
File → Export → Export As
Choose PNG and make sure transparency is enabled.
This creates a product image that can be placed over different backgrounds without a visible white box.
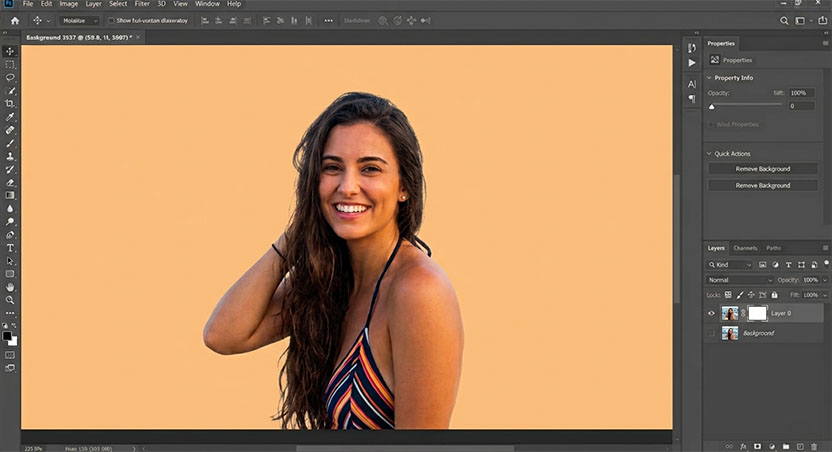
Background removal does not always mean creating transparency. You may want to replace the original background with another color or environment.
After creating the product cutout, create a new layer beneath the product.
You can then add:
For e-commerce websites, a simple white or light-colored background often creates a clean and consistent appearance.
For advertising campaigns, however, a creative background can make the product more visually engaging.
Even when using advanced Photoshop tools, several mistakes can reduce the quality of a product cutout.
Jagged edges often happen when the selection is too rough or heavily feathered.
Zoom into the image and refine the mask using a small, soft brush.
Automatic selection tools sometimes remove small parts of the actual product.
Always inspect:
Too much feathering can make the product appear blurry.
Use a small feather value and inspect the result at 100% zoom.
A white or dark halo around the subject is a common background removal problem.
This usually happens when the original background color contaminates the edge pixels.
Use Select and Mask or carefully refine the layer mask to reduce the halo.
Deleting the background permanently makes future corrections more difficult.
Whenever possible, use layer masks instead of permanently erasing pixels.
There is no single background removal tool that works perfectly for every image.
For simple products, automatic background removal can save significant time.
For medium-complexity images, Object Selection or Quick Selection can provide a good balance between speed and accuracy.
For highly detailed commercial product photography, the Pen Tool combined with layer masks often provides the greatest control.
For hair, fur, and complex edges, Select and Mask is usually more appropriate.
Professional editors often combine multiple Photoshop tools rather than relying on only one.
Online shoppers cannot physically touch or examine a product before purchasing. Product photography therefore plays a major role in how customers perceive quality.
A professionally edited product image can:
For businesses with hundreds or thousands of products, consistent background removal can also create a much more professional shopping experience.
Photoshop is an excellent tool for users who want complete control over their images. However, manually removing backgrounds from hundreds of product photos can take a significant amount of time.
E-commerce companies, photographers, and agencies often outsource background removal when they need large volumes of images processed quickly.
Professional services can be particularly useful for:
For businesses with regular editing requirements, outsourcing can allow photographers and marketing teams to focus on photography, sales, and creative work rather than repetitive image editing.
Learning how to remove the background in Photoshop is an essential skill for anyone working with product photography, e-commerce images, portraits, or digital marketing. Photoshop provides multiple tools, and choosing the right technique depends on the complexity of the subject.
For quick edits, Remove Background, Object Selection, and Quick Selection can save time. For precision work, the Pen Tool and layer masks provide greater control. For hair, fur, and complicated edges, Select and Mask can help preserve fine details.
The most important principle is to focus on clean, natural edges rather than simply deleting the background. A professional cutout should preserve every important detail of the subject while eliminating distractions.
For businesses that need large numbers of product images edited consistently, professional background removal and clipping path services can be a practical alternative to handling every image manually. With the right workflow, e-commerce sellers, photographers, and agencies can create polished product images that are ready for websites, marketplaces, catalogs, advertising campaigns, and social media.
When combined with proper lighting, high-resolution photography, color correction, and consistent image dimensions, professional background removal can become an important part of a successful e-commerce product image optimization strategy.