September 20, 2026
Great product photography can make a major difference in e-commerce. When customers cannot physically touch or examine a product, photographs become one of their main sources of information. Clear, attractive, and professional product images can communicate quality, highlight important features, and help shoppers feel more confident about buying.
The good news is that you do not need an expensive studio or years of photography experience to get started. With the right equipment, lighting, composition, and editing techniques, beginners can create impressive product photos.
Whether you are a Shopify seller, Amazon seller, small business owner, beginner photographer, or creative agency, these 50 product photography tips for beginners will help you create better product images.
Before taking photographs, learn what makes the product valuable. Identify its important features, materials, colors, textures, and details. Your photographs should communicate these characteristics clearly.
Think about who will purchase the product. Your photography style should match your audience. A luxury jewelry brand may require a different visual approach than a casual clothing store.
A simple background keeps attention on the product. White, light gray, or another neutral background is often effective for e-commerce photography.
You do not always need an expensive professional camera. A modern smartphone can produce excellent product photographs when used correctly. If you use a dedicated camera, choose one that provides sufficient resolution and manual controls.
Dust, fingerprints, scratches, and unwanted marks can become highly visible in product photographs. Clean products carefully before shooting.
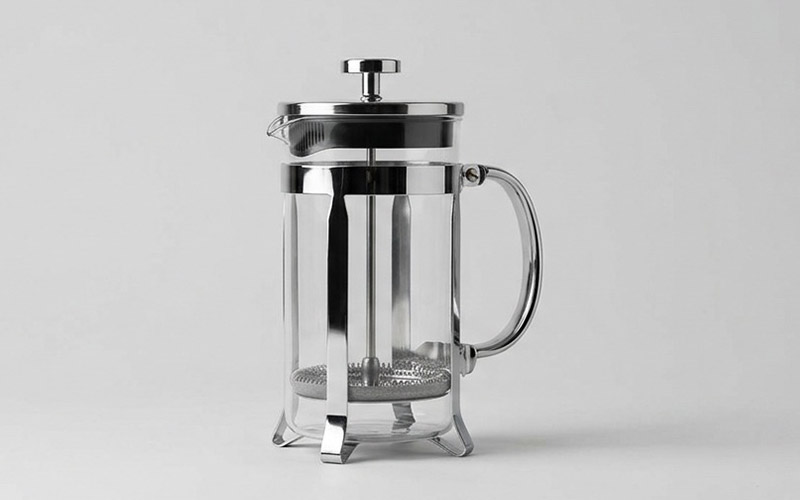
A tripod keeps your camera stable and helps produce sharper images. It also makes it easier to maintain consistent framing across multiple products.
Natural window light can be an excellent starting point for beginners. Soft daylight can create attractive product photographs without requiring expensive lighting equipment.
Direct sunlight can create strong shadows and excessive highlights. Try shooting near a window with diffused light instead.
A diffuser softens harsh light and creates more even illumination. A simple white curtain or professional diffuser can work effectively.
Once you become comfortable with natural light, experiment with continuous lights or studio strobes. Artificial lighting provides greater control and consistency.
Reflectors bounce light back toward the product and help reduce unwanted shadows. White foam board can work as an inexpensive reflector.
Shadows can add depth, but excessive shadows can distract from the product. Adjust your light source and reflector placement until the shadows look natural.
If you are photographing multiple products, keep your lighting setup consistent. This helps create a professional and uniform catalog.
Avoid unnecessary objects that compete with the product. For standard e-commerce photos, simple compositions usually work best.
The rule of thirds can help create balanced compositions, especially for lifestyle and creative product photographs.
Make sure bottles, boxes, clothing, furniture, and other products are positioned correctly. Crooked products can make professional photography look amateur.
Avoid cropping important parts of the product. Leave enough breathing room around the subject so the image can be used across different platforms.
Experiment with front, side, overhead, and three-quarter angles. Different products look better from different perspectives.
Customers often want to see a product from different sides before purchasing. Capture front, back, side, and other useful views when appropriate.
Close-up photographs can show important textures, materials, stitching, patterns, buttons, finishes, or other product details.
Lifestyle photography can help customers understand how a product fits into their everyday lives. Show the product being used naturally when appropriate.
For products where size is difficult to understand from a photograph, consider including a relevant scale reference in lifestyle images.
Fashion, beauty, accessories, and wearable products can benefit from photographs showing the product being used or worn.
Accurate colors are extremely important in e-commerce. Avoid excessive filters that make products look different from their real appearance.
Incorrect white balance can make products appear too warm or too cool. Learn how to set white balance correctly for your lighting conditions.
If your camera supports RAW files, they provide greater flexibility during editing. RAW files preserve more image information than heavily compressed formats.
A lower ISO generally produces cleaner images with less digital noise. Use adequate lighting and a stable camera to help maintain image quality.
A wider aperture can create a shallow depth of field, while a smaller aperture can keep more of the product sharp. Choose the aperture based on the product and desired look.
Make sure the important part of the product is sharp. Review images at high magnification before finishing the shoot.
A sufficiently fast shutter speed helps prevent camera shake and motion blur. A tripod allows you to use slower shutter speeds when necessary.
Digital zoom can reduce image quality. Instead, move the camera closer or use an appropriate lens.
Different lenses create different perspectives. A standard or short telephoto lens can often work well for product photography because it helps avoid excessive distortion.
Wide-angle lenses can make products appear stretched or distorted, particularly when the camera is positioned close to the subject.
When photographing multiple products, maintain a consistent camera height and angle. This creates a more uniform catalog.
Digital photography makes experimentation inexpensive. Capture multiple variations so you can select the strongest images during editing.
Review focus, exposure, composition, reflections, dust, and unwanted objects before changing the setup. This can save considerable time later.
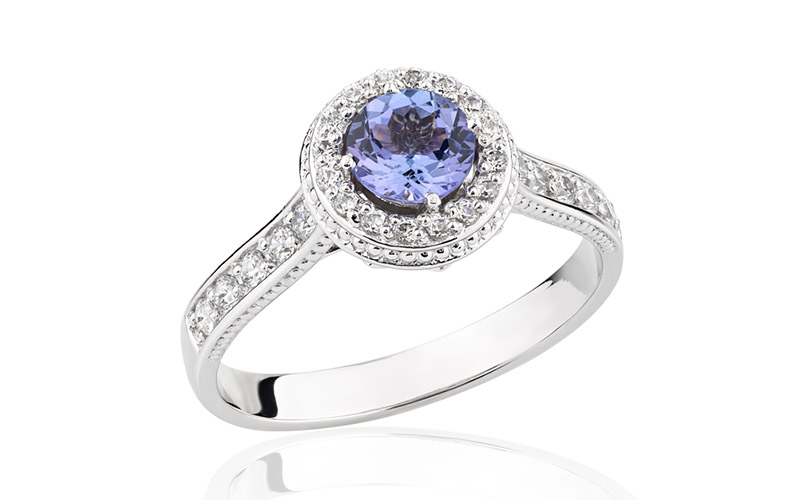
Glass, metal, jewelry, and glossy products can create difficult reflections. Adjust the position of your lights, camera, and product to control them.
Glass bottles and transparent objects often require careful lighting and background control. Use soft lighting and experiment with contrast around the edges.
A lightbox can provide controlled, diffused lighting for small products such as jewelry, electronics, accessories, and cosmetics.
If you are building an online catalog, use the same or similar background across products. Consistency creates a more professional appearance.
Basic editing can improve exposure, contrast, color, cropping, and sharpness. However, avoid excessive editing that changes the product’s real appearance.
Background removal can make product images cleaner and more consistent. This is especially useful for marketplaces and e-commerce stores that require isolated product images.
Products with complex edges, such as clothing, furniture, jewelry, or accessories, may require precise clipping paths. Professional manual editing can produce cleaner results around difficult edges.
A subtle shadow can give an isolated product more depth and make it appear grounded. Avoid overly dark or unrealistic shadows.
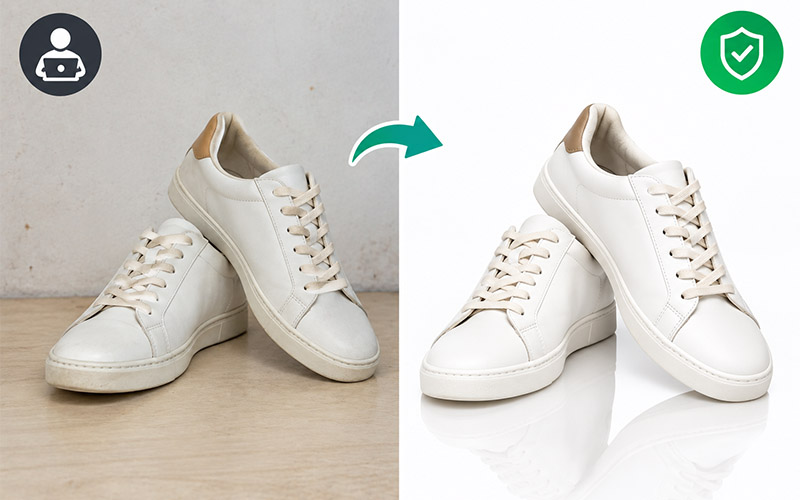
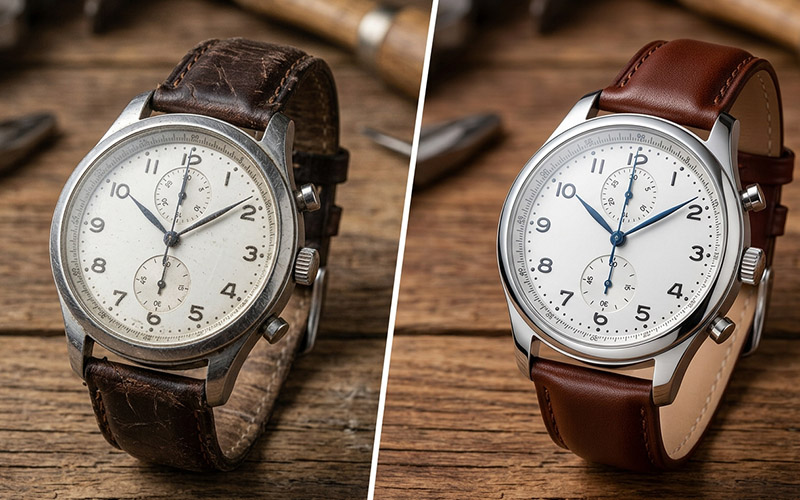
Professional retouching can remove dust, small scratches, and temporary imperfections while preserving the product’s authentic appearance.
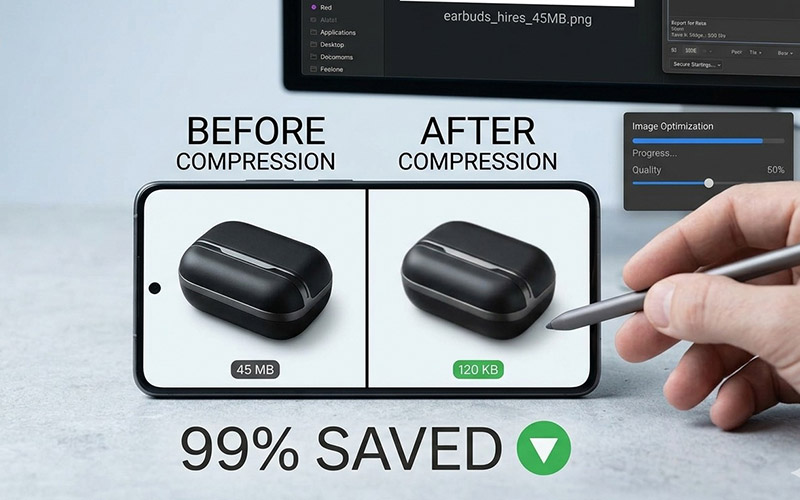
Do not upload unnecessarily huge original camera files to your website. Resize images according to the requirements of your e-commerce platform.
Image compression can reduce file size and help pages load more efficiently. Compress carefully so that important product details remain sharp.
Use descriptive file names such as:
black-leather-wallet.jpg
rather than generic names like:
IMG_4932.jpg
Also provide useful alt text that accurately describes the product image.

Different e-commerce platforms can have different image requirements. Before publishing, check the current specifications for platforms such as Shopify, Amazon, Etsy, or your own website.
Pay attention to:
Following platform requirements helps prevent unnecessary rework.

The final tip is to create a consistent workflow.
A simple product photography workflow might include:
Prepare → Clean → Set up lighting → Position product → Shoot → Review → Edit → Remove background if necessary → Resize → Compress → Upload
A repeatable process saves time and improves consistency, especially when photographing hundreds of products.
Beginners often focus on expensive cameras while overlooking lighting and preparation. In many cases, better lighting and a clean setup can make a bigger difference than upgrading equipment.
Avoid these common mistakes:
Improving these areas can dramatically raise the quality of an e-commerce product catalog.
DIY photography can work well for small businesses and beginners. However, professional photography may be worthwhile when your brand depends heavily on visual presentation.
Professional photographers can provide:
Professional photography is particularly useful for fashion, jewelry, cosmetics, furniture, electronics, and premium consumer products.
Photography is only one part of the process. Post-production can also have a major impact on the final result.
Professional image editing services can help with:
For photographers and agencies handling large product catalogs, outsourcing image editing can reduce repetitive work while maintaining consistent quality.
Learning product photography does not require expensive equipment or years of experience. The most important skills are understanding light, controlling composition, keeping products clean, maintaining consistency, and paying attention to detail.
These 50 product photography tips for beginners provide a practical foundation for creating better e-commerce images. Start with the basics, experiment with different lighting and camera angles, and gradually develop a repeatable workflow.
For e-commerce sellers, professional-looking product images can make an online store feel more trustworthy and make products easier for customers to understand. For photographers and agencies, combining strong photography with professional editing can provide even greater value to e-commerce clients.
Remember that great product photography is not simply about taking attractive pictures. It is about presenting a product clearly, accurately, and consistently so customers can make informed purchasing decisions.