August 30, 2026
Jewelry photography is one of the most demanding areas of e-commerce image editing. Rings, necklaces, bracelets, earrings, watches, and other accessories are often small, highly reflective, and covered with fine details that can easily disappear in an unedited photograph. Even when a jewelry product is photographed with professional lighting and a high-quality camera, the final image usually needs careful retouching before it is ready for an online store, marketplace, catalog, or advertising campaign.
A well-retouched jewelry image does more than make a product look attractive. It helps customers understand the item’s shape, material, color, texture, and craftsmanship. Clean product photography can also create a consistent visual identity across an entire jewelry collection.
This jewelry photo retouching tutorial explains the essential techniques for turning ordinary jewelry photographs into polished, professional product images. Whether you are an e-commerce seller, photographer, photo editor, or creative agency, these steps can help you build a reliable jewelry retouching workflow.
Jewelry photo retouching is the process of digitally improving jewelry photographs while preserving the product’s authentic appearance. It may include background removal, dust and scratch cleanup, color correction, reflection control, gemstone enhancement, shadow creation, and final image optimization.
The objective is not to make jewelry look unrealistic. Instead, professional retouching should reproduce the product as accurately and attractively as possible.
For e-commerce businesses, accurate retouching is particularly important. Customers cannot physically inspect a product before purchasing it, so the photograph needs to communicate its details clearly.
Jewelry is strongly influenced by light. Gold, silver, platinum, diamonds, gemstones, and polished metals can produce bright highlights and dark reflections that make editing complicated.
A poorly edited image may have:
Professional jewelry photo retouching addresses these problems while keeping the product realistic.
For online retailers, improved product images can also contribute to a more professional storefront. When every product follows a consistent photography style, customers can browse collections more comfortably and develop greater confidence in the brand.
Before opening Photoshop or another editing application, start with the highest-quality original image available. A RAW file is preferable when possible because it provides greater flexibility for exposure, white balance, and color adjustments.
Inspect the photograph carefully before making changes. Check whether the jewelry is properly exposed, whether important details are sharp, and whether any part of the product is hidden by reflections or shadows.
It is also useful to identify the final purpose of the image. A marketplace listing may require a clean white background, while a luxury jewelry advertisement may benefit from a more artistic composition.
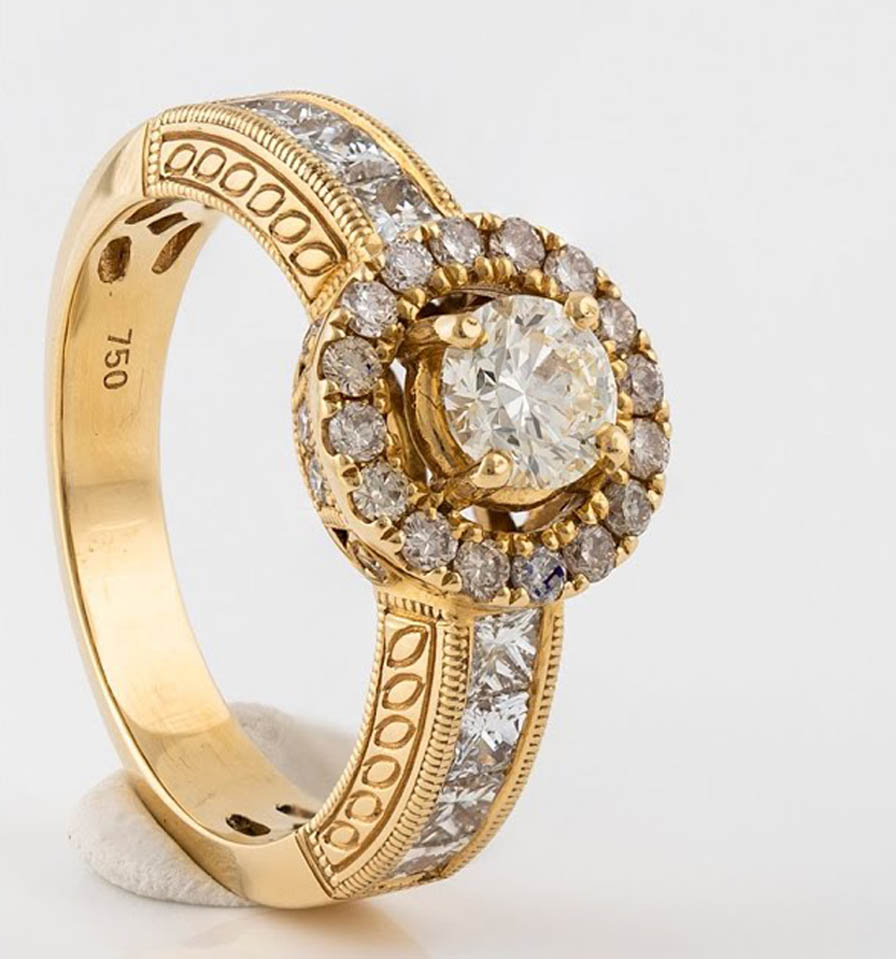
The first editing stage should usually focus on basic image correction.
Adjust exposure if the jewelry appears too dark or too bright. Then correct the white balance so that the metal and gemstones appear as they do in real life.
Be particularly careful with gold jewelry. Excessive yellow or orange tones can make gold look unnatural. Similarly, silver and platinum should generally retain their neutral appearance rather than becoming blue or gray.
Use adjustment layers whenever possible. This allows you to make changes without permanently altering the original image.
Background removal is one of the most common requirements for e-commerce jewelry photography.
A clean background helps customers focus entirely on the product. For marketplace and catalog images, pure white or another specified neutral background may be required.
Photoshop’s Pen Tool is particularly useful for jewelry because it provides precise control around complex shapes. Selection tools and automated background-removal features can speed up the process, but detailed manual refinement is often necessary.
Pay close attention to:
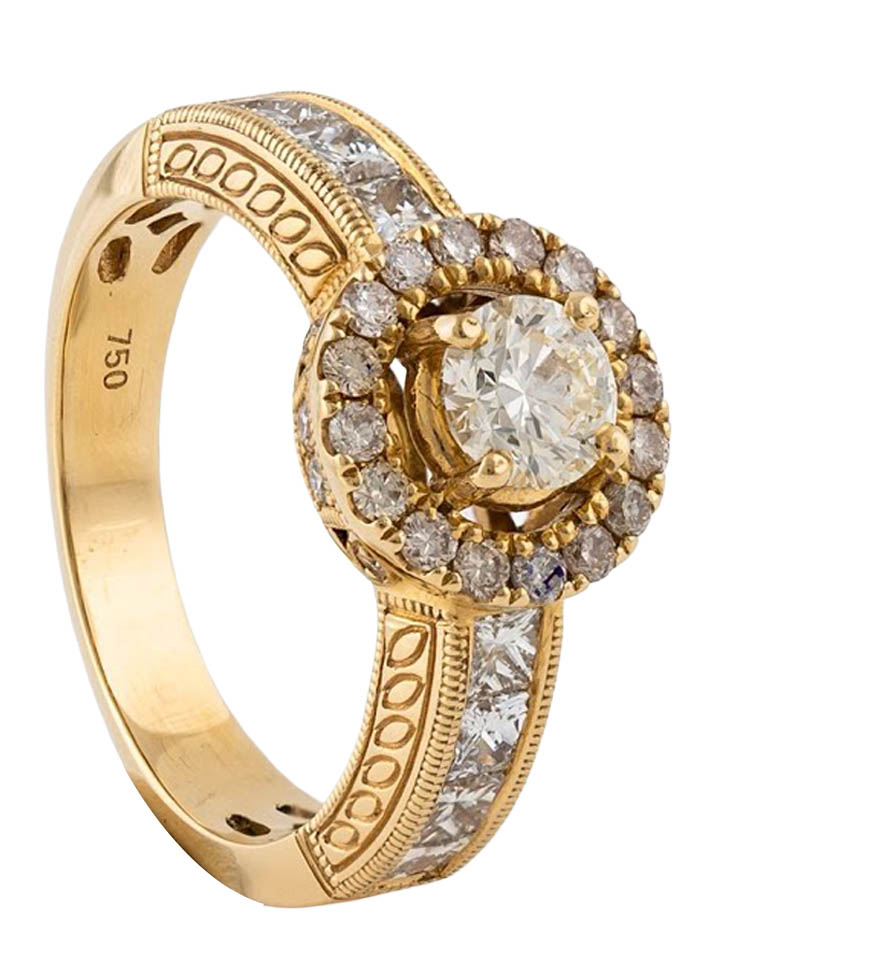
After removing the background, inspect the image at high magnification. Even tiny leftover pixels can become noticeable when the image is displayed against a clean white background.
Jewelry surfaces easily collect dust, fingerprints, tiny scratches, and other imperfections. These may not be obvious in the original photograph but can become very noticeable after sharpening or resizing.
Use tools such as the Healing Brush, Clone Stamp, or Spot Healing Brush to remove unwanted marks.
However, avoid excessive cleaning. Jewelry should still retain realistic surface characteristics. If you remove every subtle variation from polished metal, the product may begin to look artificial.
A good rule is to remove distractions rather than erase authentic product details.
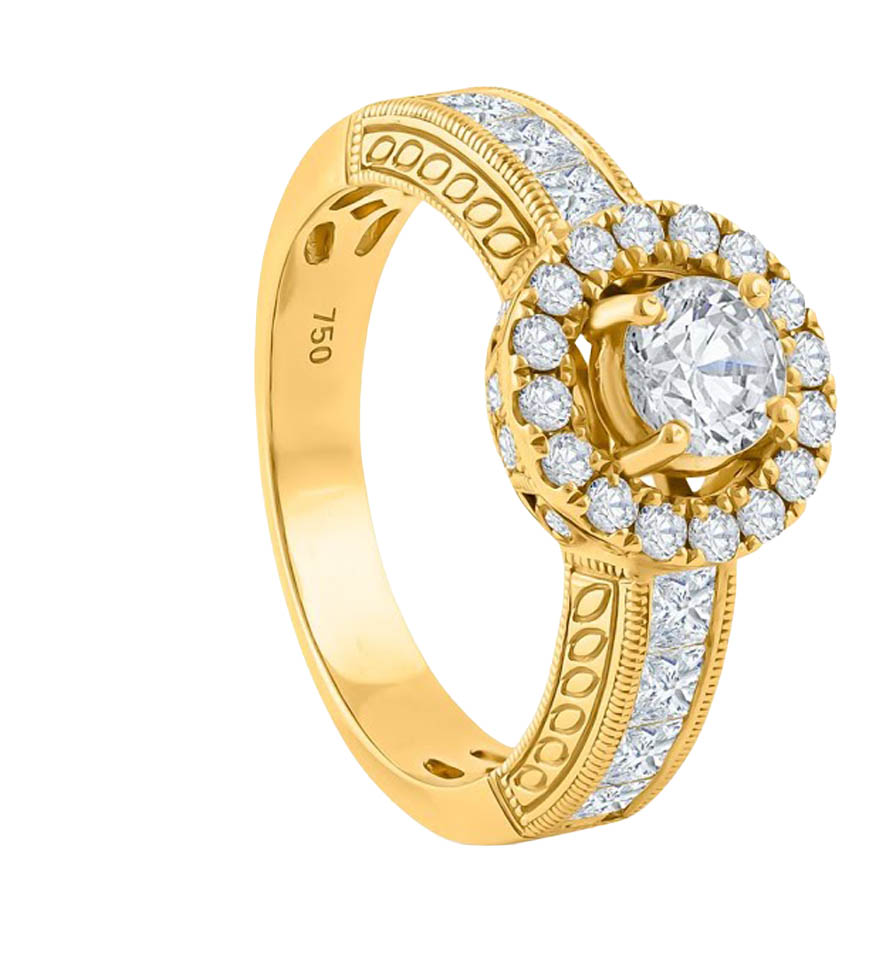
Metal retouching requires patience because polished surfaces often contain complex reflections.
For silver and platinum jewelry, maintain clean highlights while preserving natural gradients. For gold, make sure the color remains rich without becoming excessively saturated.
Instead of simply increasing contrast, use curves, levels, masks, and localized adjustments to shape the highlights and shadows.
Professional retouchers often use separate layers for different areas of the product. This provides better control over the ring, setting, gemstone, chain, or other components.
Gemstones are often the visual centerpiece of jewelry photography.
When retouching diamonds, emeralds, rubies, sapphires, or other stones, the goal should be to emphasize existing brilliance rather than inventing unrealistic sparkle.
Adjust local contrast carefully to improve clarity. Brighten appropriate facets while maintaining natural shadows. If the stone looks dull because of the original lighting, selective dodging and burning can help restore visual depth.
For diamonds, small controlled highlights can make facets appear more vibrant. However, adding excessive glow or artificial sparkles can reduce credibility.
The same principle applies to colored gemstones. Preserve their actual color and avoid heavy saturation that changes the perceived product.
Dodge and burn is one of the most valuable techniques in jewelry photo retouching.
Dodging selectively brightens areas, while burning darkens them. Used carefully, these tools can improve the shape and dimensionality of metal and gemstones.
For example, you can brighten a naturally occurring highlight on a curved ring while slightly darkening an adjacent area to emphasize its form.
Use a soft brush with low opacity and build the effect gradually. Strong, abrupt adjustments can create obvious editing artifacts.
Working on a separate layer or using non-destructive methods is recommended because jewelry often requires multiple rounds of refinement.
Reflection control is one of the biggest challenges when editing jewelry.
Highly polished surfaces reflect cameras, light sources, backgrounds, and surrounding objects. Some reflections can make the product look dirty or distorted.
Use the Clone Stamp, Healing Brush, Curves, and masking techniques to reduce distracting reflections while preserving realistic highlights.
Do not remove every reflection. Real metal needs some reflection to communicate its material. The goal is controlled realism, not a completely flat surface.
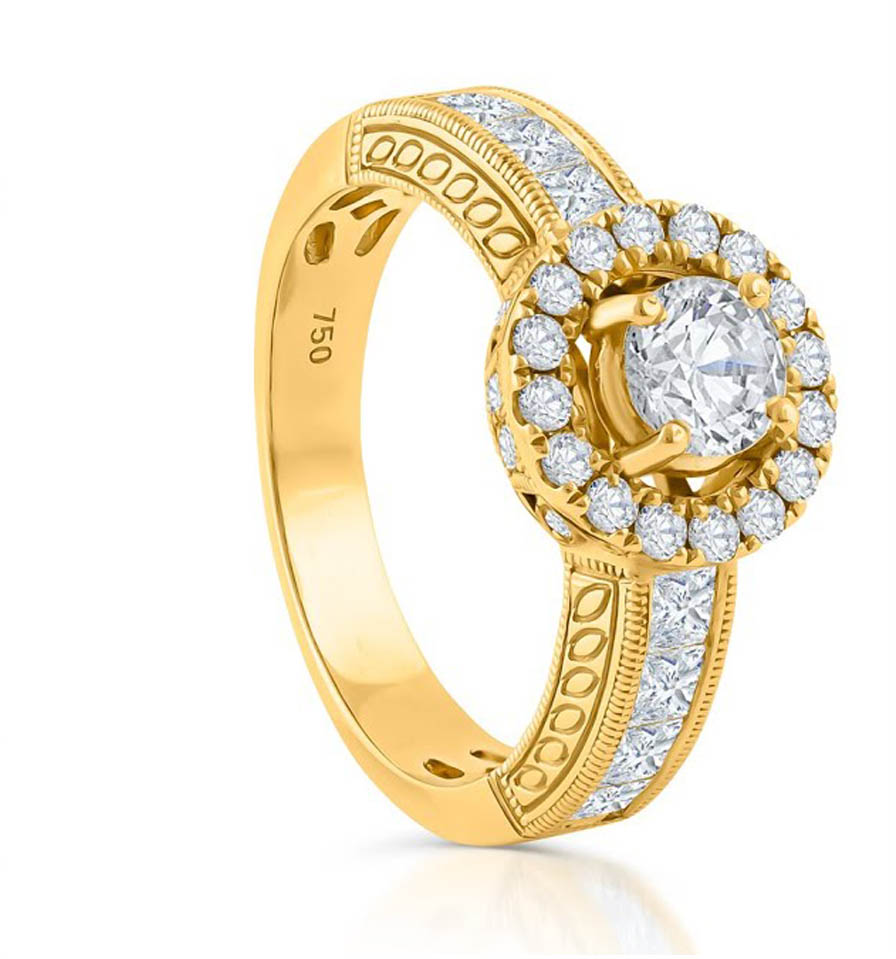
A jewelry image can look disconnected if the product appears to float against a white background.
A subtle natural-looking shadow can give the product depth and visual weight. Create the shadow on a separate layer so that its opacity and softness can be adjusted independently.
Keep the shadow consistent with the direction of the original lighting. If the light appears to come from the upper left, the shadow should generally extend in a believable opposite direction.
For marketplace images, keep the shadow subtle. For creative advertising images, you can use stronger shadows when the design requires them.
Color accuracy is critical for jewelry businesses. A customer expects a gold ring, silver necklace, or blue gemstone to look reasonably similar when the physical product arrives.
Use the original photograph and, when available, color references to maintain accuracy.
Avoid blindly increasing saturation. Instead, use selective color adjustments and targeted masks.
Different screens can display colors differently, so the goal is not perfect color reproduction on every device. The goal is to produce a consistent, balanced, and realistic master image.
Jewelry contains tiny details that benefit from controlled sharpening.
Apply sharpening near the end of the editing process rather than at the beginning. This allows you to evaluate the final image after resizing and other corrections.
Focus sharpening on important product details such as gemstone facets, metal edges, engravings, and prongs.
Avoid excessive sharpening because it can introduce halos, noise, and unnatural edges.
Before exporting the final image, inspect it at 100% magnification.
Look for:
Then view the image at its normal display size. Some imperfections that look significant at 200% may be irrelevant at normal viewing size, while other problems may become more obvious when the image is reduced.
Professional retouching requires both close inspection and an overall visual assessment.
E-commerce sellers should prioritize consistency. If you have hundreds of jewelry products, every image should follow the same visual standards.
Keep background color, product scale, crop, lighting appearance, and overall positioning consistent.
Create Photoshop actions or templates for repetitive tasks when possible. This can save considerable time when processing large product catalogs.
It is also important to keep original files safely stored. Never overwrite the master photograph with a flattened final version. Maintaining editable files makes future revisions much easier.
One of the most common mistakes is over-retouching. Jewelry should look polished, but it should not look fake.
Other common mistakes include excessive saturation, unrealistic reflections, overly bright diamonds, harsh shadows, inconsistent backgrounds, and inaccurate metal colors.
Another problem is changing the physical characteristics of the product. Retouching should improve presentation without misleading customers about the item’s actual appearance.
A reliable workflow can make the editing process faster and more consistent:
This process can be adapted depending on the product type and project requirements.
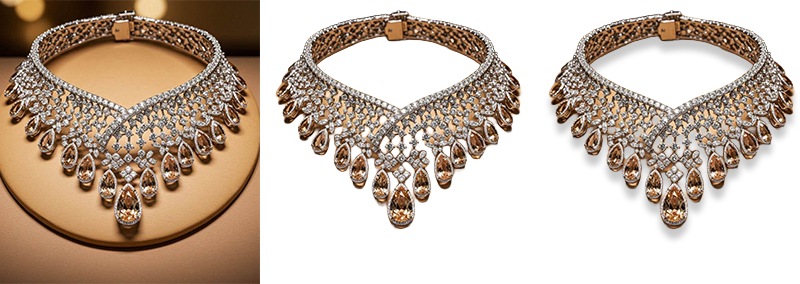
Jewelry editing can be time-consuming, especially when a business has hundreds or thousands of product photographs.
E-commerce brands may benefit from outsourcing when internal teams do not have enough time or specialized retouching skills. Professional photo editing agencies can provide consistent results across large catalogs while allowing photographers and business owners to focus on photography, marketing, and sales.
Outsourcing can be particularly useful for complex jewelry images involving diamonds, gemstones, intricate chains, reflective metals, or multiple products that need to follow strict brand guidelines.
Professional jewelry photo retouching is a combination of technical precision and visual judgment. The best results do not simply make jewelry brighter or more colorful. They preserve the product’s authentic appearance while removing distractions and highlighting the details that customers need to see.
For e-commerce sellers, photographers, and agencies, developing a consistent retouching workflow can significantly improve the quality of a jewelry catalog. Techniques such as background removal, dust cleanup, reflection control, gemstone enhancement, dodge and burn, color correction, and careful sharpening are essential parts of the process.
Whether you edit jewelry photographs yourself or work with a professional retouching service, always prioritize realism, consistency, and detail. A high-quality jewelry image can make a product look more premium, communicate craftsmanship more effectively, and create a stronger visual impression in a competitive e-commerce market.