October 8, 2026
High-quality product images are essential for building a successful online store. When customers shop online, they cannot physically touch, examine, or try products before making a purchase. They rely heavily on product photographs to understand an item’s appearance, color, texture, size, and overall quality. This makes professional product photo editing an important part of every e-commerce business.

However, capturing a great photograph is only the beginning. Proper editing ensures that product images look consistent, accurately represent the items being sold, and meet the requirements of different online marketplaces. From background removal and color correction to image resizing and final quality checks, every step contributes to a professional shopping experience.
This product photo editing checklist for online stores is designed for e-commerce sellers, photographers, creative agencies, and image editing professionals. Whether you manage a small online shop or a large product catalog, following a structured editing workflow can help you save time, maintain consistency, and produce publication-ready images.
Product photo editing helps transform ordinary photographs into clear, attractive, and professional images. Well-edited product photos make it easier for customers to examine products and understand their features before purchasing.
A consistent image editing process also strengthens brand identity and creates a more organized appearance across product pages, category listings, and promotional campaigns.
Some important benefits of professional product photo editing include:

Following a step-by-step checklist helps ensure that every product image meets your store’s visual standards. Use the following process before publishing product photographs on your website or e-commerce marketplace.
Before editing
The first step is to evaluate the original photograph. Even advanced editing software cannot fully correct every problem caused by poor image capture.
Before starting the editing process, check the following:
If the original image is too blurry or severely underexposed, consider retaking the photograph instead of spending excessive time trying to repair it.

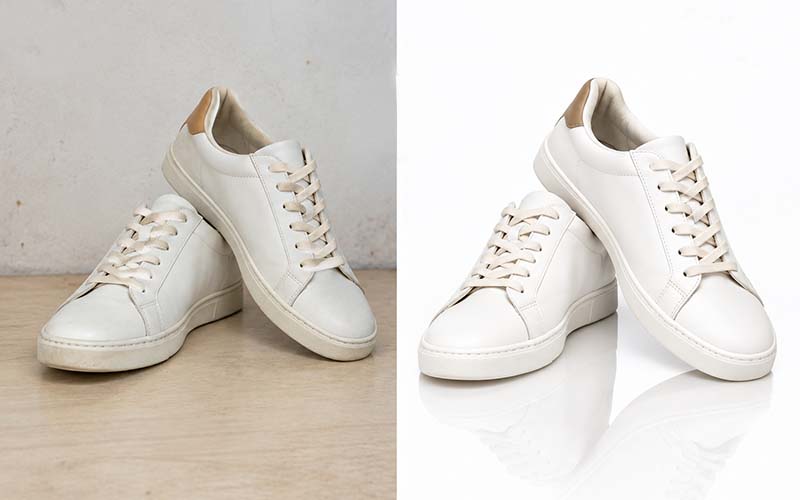
Background removal is one of the most common steps in e-commerce product photo editing. A clean background helps customers focus on the product rather than unnecessary visual elements.
Use this checklist when removing backgrounds:
Tools such as Adobe Photoshop and AI-powered background removal applications can simplify this process. For products with complex edges, professional clipping path and image masking techniques can provide greater precision.
Proper exposure ensures that product details are visible without making the image appear too dark or excessively bright.
Check the following during exposure correction:
The objective is to produce a naturally illuminated product image that accurately represents the item.
Color accuracy is particularly important for clothing, cosmetics, furniture, accessories, and other products where color influences purchasing decisions.
Use this color correction checklist:
Accurate color correction helps customers develop realistic expectations about the products they purchase.
Retouching removes distracting imperfections while preserving the product’s authentic appearance. It is especially useful for commercial product photography and premium e-commerce catalogs.
Before finalizing an image, check for:
Use tools such as the Healing Brush, Clone Stamp, and other suitable retouching features in Adobe Photoshop. Avoid removing genuine product features, defects that customers should know about, or details that would misrepresent the item.

Sharpness plays an important role in product photography because customers often zoom in to examine product details.
Follow these image sharpening steps:
Different products require different sharpening approaches. Jewelry, electronics, clothing, and soft-textured products may need different levels of detail enhancement.
Shadows help communicate the shape, depth, and position of a product. Removing all shadows can sometimes make an object appear unnatural or disconnected from its background.
Use the following checklist:
Products such as glass bottles, watches, metal accessories, and glossy electronics may require specialized editing techniques to maintain realistic reflections.

Proper cropping helps present products consistently and makes images suitable for different website layouts and marketplace listings.
Before exporting, confirm that:
For product catalogs, establish a standard framing style to make category pages look clean and organized.
Image dimensions and file sizes can influence how product images appear on different devices and how efficiently pages load.
Check the following before resizing:
Always review the current image requirements of the platform where you plan to publish your photographs.
Large image files can affect website performance, particularly when product pages contain multiple high-resolution photographs.
Use this optimization checklist:
For example, a file name such as black-leather-handbag-front-view. webp is more informative than IMG_4582.jpg.
Consistency is important when customers browse multiple products within the same online store. Different backgrounds, lighting conditions, and image dimensions can make a product catalog look disorganized.
Use a standard editing style for each product category:
Creating an image editing style guide can help photographers, editors, and agencies maintain consistency across large catalogs.
Different e-commerce platforms may have specific rules for product photographs. Some require a clean white background for primary images, while others support lifestyle photography, additional graphics, or alternative image formats.
Before uploading, verify:
Following marketplace-specific guidelines helps reduce image rejection and unnecessary rework.
Many customers browse online stores using smartphones, so product photographs should look clear and balanced across different screen sizes.
Review each image on desktop and mobile layouts. Make sure the product remains visible in thumbnail views, important details are not lost through responsive cropping, and the image is sharp enough for the intended display size.
If your store supports zoom functionality, inspect high-resolution images to ensure that close-up details remain clear.
Before publishing, conduct a final review of every edited image. This is particularly important for businesses managing large product catalogs or working with multiple image editors.
Final product photo editing checklist:
Choosing suitable editing software can make your workflow more efficient and consistent.
Adobe Photoshop: Ideal for detailed retouching, clipping paths, background removal, image masking, and advanced product photo editing.

Adobe Lightroom: Useful for color correction, exposure adjustments, image organization, and batch processing.
Capture One: A professional solution for advanced color control, tethered shooting, and commercial photography workflows.
Canva: Suitable for preparing product marketing graphics, promotional images, and social media content.
Remove.bg: A convenient AI-powered tool for removing backgrounds from straightforward product images.
The best tool depends on your editing requirements, technical experience, image complexity, and production volume.
Editing product photographs can become time-consuming when an online store manages hundreds or thousands of products. Professional image editing services can help businesses maintain consistent quality while reducing the workload of in-house teams.
Professional editors can provide background removal, clipping paths, image masking, color correction, shadow creation, and detailed retouching based on specific business requirements.
For e-commerce sellers, photographers, and agencies, outsourcing image editing can also support larger projects, improve workflow flexibility, and free up time for photography, marketing, and business development.
At ClippingImages.com, businesses can explore professional image editing solutions designed to prepare clean, accurate, and publication-ready product photographs for online stores, catalogs, and advertising campaigns.

A structured product photo editing checklist helps online stores maintain professional image quality, improve product presentation, and create a consistent shopping experience. From checking the original photograph and removing backgrounds to correcting colors, retouching imperfections, optimizing file sizes, and performing final quality checks, every stage contributes to the finished image.
Whether you are a small e-commerce seller, a professional photographer, or a creative agency, following a repeatable editing workflow can reduce errors and make product image management more efficient.
The key is to balance visual appeal with accuracy. Product images should look attractive while still representing the real item customers will receive. By combining suitable editing tools, consistent standards, and professional quality control, businesses can create product photographs that support their brand identity and help customers shop with confidence.